Since I was in D.C. for a sort of reunion with some of the ladies who were on last year's French Needle tour, I got the chance to meet up with Lisa the owner of the French Needle. She had us over for dinner at her house one night and was kind enough to show us the shop. There were so many things I wanted to bring home with me especially her gorgeous scissors, but I settled for getting these three kits.
Two kits are by Canevas Folies. Lisa has decided not to carry them anymore and has reduced the price of the kits. There should be some left in the Sales page. I also got this adorable little thread painted fox by the Bluebird Embroidery Co.

Months ago, I had placed an order for the goldwork kit for Lucy Barter's craftsy class. My friend Carolyn was kind enough to lend me her address so I can save on shipping. Lucky I bought it when I did, it seems the price went up. The kit comes in a lovely tin to keep it all safe, but doesn't come with fabric. I'm picking that up in May from Alison Cole. The plan is to start this piece in the fall, so I will show you the contents then.

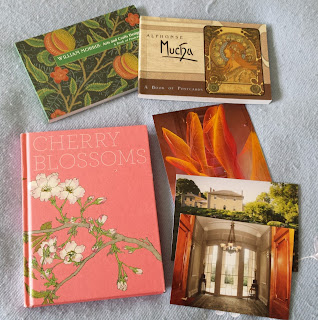
I also picked up some lovely inspiration art and postcards from the museums we visited.
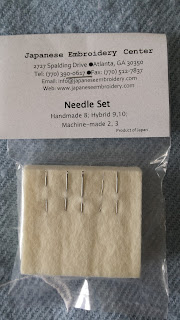
When we were at the JEC, we picked up our orders for class which included any tools we would need. I had purchased a full set of the needles with the wool felt for storage, an awl (this one came in very handy during class), and a pair of standard komas. Standard meaning they're not made of any special wood. You can see the other wood selections here, some of them are quite pricey.

Here's a close up of the needles. There is another longer needle at the back for lacing fabric. For our class we only used the M2 and M3 (M is for machine made). They are really tiny and very short. I'm really worried I might lose them, so I will have to be very careful. We used them for beading, but they are also used with couching thread.
We had the opportunity to do some shopping at lunch time. You could peruse all their stock which was at the back of the class. I was very good and didn't look at any of the fabrics, metal and silk threads. I'm no where near that level yet. For us beaders, they laid out their stock of beads for us to do some shopping. I tried to be smart in my color choices but couldn't help getting the berry and purple beads. The beads they stock are a combination of Miyuki and Toho beads, but their 3-cut beads are Czech not unlike the beads I bought for Hana. I was talking to one of the staff members and she mentioned it's getting harder and harder to find certain beads in Japan.


The books are pocket sized, so the patterns are small. They would be perfect for embroidery.

These also came back with me.

Unfortunately, I can't say they're mine :P A friend who does goldwork heard I was going and asked if I could pick up an order for her. These are a selection of some of the metal threads the JEC carries including a sampler card. She's already started playing with her new stash, you can see her progress on her Facebook page here.
Two kits are by Canevas Folies. Lisa has decided not to carry them anymore and has reduced the price of the kits. There should be some left in the Sales page. I also got this adorable little thread painted fox by the Bluebird Embroidery Co.

Months ago, I had placed an order for the goldwork kit for Lucy Barter's craftsy class. My friend Carolyn was kind enough to lend me her address so I can save on shipping. Lucky I bought it when I did, it seems the price went up. The kit comes in a lovely tin to keep it all safe, but doesn't come with fabric. I'm picking that up in May from Alison Cole. The plan is to start this piece in the fall, so I will show you the contents then.

I also picked up some lovely inspiration art and postcards from the museums we visited.

When we were at the JEC, we picked up our orders for class which included any tools we would need. I had purchased a full set of the needles with the wool felt for storage, an awl (this one came in very handy during class), and a pair of standard komas. Standard meaning they're not made of any special wood. You can see the other wood selections here, some of them are quite pricey.

Here's a close up of the needles. There is another longer needle at the back for lacing fabric. For our class we only used the M2 and M3 (M is for machine made). They are really tiny and very short. I'm really worried I might lose them, so I will have to be very careful. We used them for beading, but they are also used with couching thread.

We had the opportunity to do some shopping at lunch time. You could peruse all their stock which was at the back of the class. I was very good and didn't look at any of the fabrics, metal and silk threads. I'm no where near that level yet. For us beaders, they laid out their stock of beads for us to do some shopping. I tried to be smart in my color choices but couldn't help getting the berry and purple beads. The beads they stock are a combination of Miyuki and Toho beads, but their 3-cut beads are Czech not unlike the beads I bought for Hana. I was talking to one of the staff members and she mentioned it's getting harder and harder to find certain beads in Japan.

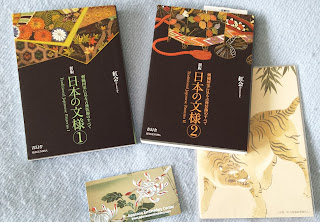
I took the opportunity to buy 3 sets of postcards: one to keep and two to send out to friends. And you know my love of books. These can be bought separate or as a set and contain traditional patterns for Japanese Embroidery.

They are not very different from coloring books, but you'll never see me coloring in them.

The books are pocket sized, so the patterns are small. They would be perfect for embroidery.

These also came back with me.

Unfortunately, I can't say they're mine :P A friend who does goldwork heard I was going and asked if I could pick up an order for her. These are a selection of some of the metal threads the JEC carries including a sampler card. She's already started playing with her new stash, you can see her progress on her Facebook page here.


